Table of Contents
- Getting Started
- EO.Pdf
- EO.Web
- Overview
- Installation & Deployement
- EO.Web ToolTip
- EO.Web Rating
- EO.Web Slider & RangeSlider
- EO.Web ListBox
- EO.Web ComboBox
- EO.Web Captcha
- EO.Web ASPX To PDF
- EO.Web Slide
- EO.Web Flyout
- EO.Web EditableLabel
- EO.Web ImageZoom
- EO.Web Floater
- EO.Web Downloader
- EO.Web ColorPicker
- EO.Web HTML Editor
- EO.Web File Explorer
- EO.Web SpellChecker
- EO.Web Grid
- EO.Web MaskedEdit
- EO.Web Splitter
- EO.Web Menu
- EO.Web Menu
- Product Feature List
- Performance Tips
- Quick Start Guide
- Using EO.Web Menu
- Understanding built-in styles
- EO.Web Slide Menu
- EO.Web TabStrip
- EO.Web TreeView
- EO.Web Calendar
- EO.Web Callback
- EO.Web MultiPage
- EO.Web Dialog
- EO.Web AJAXUploader
- EO.Web ProgressBar - Free!
- EO.Web ToolBar - Free!
- EO.WebBrowser
- EO.Wpf
- Common Topics
- Reference
| Quick start: Using Expand/Collapse Effects |
Overview
EO.Web Menu supports 60+ expand/collapse effects. Features include:
- Apply different effects on different submenus.
- Apply effects on a look item, then apply the look item to a group of navigation items.
- Apply effects on a skin, then apply the skin to a menu;
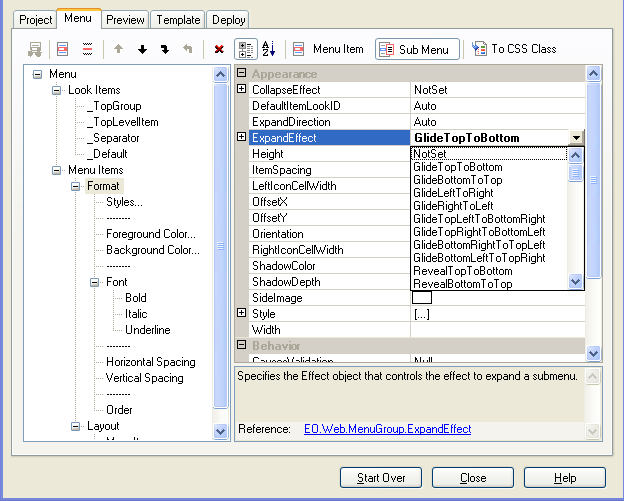
This section demonstrates how to apply ExpandEffect to a submenu using Menu Builder.
Applying Effects using Menu Builder
Following these steps to apply expand effect to a submenu in Visual Studio:-
Drag an EO.Web Menu
control
 from the toolbox and drop it on the
page. If you can not find EO.Web menu control in Visual Studio's toolbox,
please refer to Installation guide;
- Right click the menu, select Menu Builder from the designer context menu to start Menu Builder;
- In the Skin tab, choose one of the built-in skins to start from. The right pane displays the rendered result of the skin menu. If you do not want to use a skin, you can switch to Menu tab directly;
-
In the Menu tab, click on navigation items node.
Click New navigation item
 button
on the toolbar a few times to create a few new navigation items;
-
Select one of the navigation item you just created, click New navigation item
 button on the toolbar a few times to create a few sub navigation items;
-
Select the parent navigation item, click on Sub Menu
 button
on tool bar, select ExpandEffect
property, click the drop down button and select the effect type;
- Switch to the Preview tab to preview the result.

Use the same steps to set CollapseEffect . Note that if specified, EO.Web Menu automatically renders the "reverse effect" of the specified collapse effect. Rendering the "reverse effect" for CollapseEffect makes it easy to set both ExpandEffect and CollapseEffect to the same value without worrying about whether they match.

